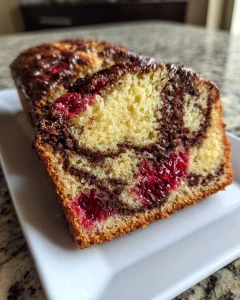
Hawaiian Butter Mochi with Ube
As a busy mom, I know how precious time can be, especially when it comes to whipping up something sweet. That’s why I adore this Hawaiian Butter Mochi with Ube! It’s a delightful dessert that combines the rich flavors of butter and ube, creating a chewy treat that’s sure to impress. Whether you’re hosting a gathering or just want to indulge your family, this recipe is a quick solution that brings a taste of the islands right to your kitchen. Trust me, once you try it, you’ll be hooked!
Why You’ll Love This Hawaiian Butter Mochi with Ube
This Hawaiian Butter Mochi with Ube is not just a dessert; it’s a celebration of flavors! It’s incredibly easy to make, requiring minimal prep time. Plus, the chewy texture and sweet, buttery taste will have your family asking for seconds. Perfect for busy days, this treat can be whipped up in no time, making it a go-to recipe for any occasion. You’ll love how it brightens up your dessert table!
Ingredients for Hawaiian Butter Mochi with Ube
Gathering the right ingredients is the first step to creating this delightful Hawaiian Butter Mochi with Ube. Here’s what you’ll need:
- Sweet rice flour: This is the star of the show! It gives the mochi its signature chewy texture.
- Sugar: A touch of sweetness to balance the flavors. You can use granulated or even coconut sugar for a twist.
- Baking powder: This helps the mochi rise slightly, giving it a light and fluffy texture.
- Salt: Just a pinch enhances the overall flavor, making the sweetness pop.
- Coconut milk: Adds a rich, creamy flavor that complements the ube beautifully. You can substitute with almond or soy milk if needed.
- Unsalted butter: The melted butter brings a luscious richness. If you prefer a dairy-free option, coconut oil works well too.
- Ube puree: This is what gives the mochi its vibrant color and unique flavor. You can find it in Asian grocery stores or make your own from fresh ube.
- Eggs: They help bind everything together and add moisture. For a vegan alternative, consider using flax eggs.
For exact measurements, check the bottom of the article where you can find everything listed for easy printing. Happy cooking!
How to Make Hawaiian Butter Mochi with Ube
Step 1: Preheat the Oven
First things first, preheat your oven to 350°F (175°C). This step is crucial for even baking. While the oven warms up, grease a 9×13 inch baking dish. A well-greased dish ensures your mochi won’t stick, making it easier to cut and serve later.
Step 2: Mix Dry Ingredients
In a large bowl, whisk together the sweet rice flour, sugar, baking powder, and salt. This step is essential for evenly distributing the ingredients. Make sure there are no lumps, as they can affect the texture of your Hawaiian Butter Mochi with Ube.
Step 3: Combine Wet Ingredients
In another bowl, mix the coconut milk, melted butter, ube puree, and eggs until well combined. This mixture should be smooth and creamy. The ube puree adds a beautiful color and flavor, making your dessert truly special. Don’t rush this step; it’s worth it!
Step 4: Combine Wet and Dry Mixtures
Now, pour the wet ingredients into the dry ingredients. Gently mix until everything is smooth and well incorporated. Avoid overmixing, as this can make the mochi tough. You want a lovely, silky batter that’s ready to transform into a sweet treat!
Step 5: Bake the Mochi
Pour the batter into your prepared baking dish, spreading it evenly. Bake for 45-50 minutes, or until the top is golden brown. A toothpick inserted in the center should come out clean. The aroma wafting through your kitchen will be irresistible!
Step 6: Cool and Serve
Once baked, let the mochi cool in the dish for a bit. This cooling time is important; it helps the texture set. After it’s cool, cut it into squares and serve. Trust me, the wait will be worth it when you take that first bite!
Tips for Success
- Use a kitchen scale for precise measurements, especially for sweet rice flour.
- Let the mochi cool completely before cutting to avoid a sticky mess.
- For a fun twist, add shredded coconut or chocolate chips to the batter.
- Store leftovers in an airtight container to keep them fresh and chewy.
- Experiment with different flavors of puree, like pandan or mango, for variety!
Equipment Needed
- 9×13 inch baking dish: A standard size for even baking. You can also use an 8×8 inch dish for thicker mochi.
- Mixing bowls: A set of various sizes is handy. You can use any large bowl you have on hand.
- Whisk: Essential for mixing ingredients. A fork can work in a pinch!
- Measuring cups and spoons: For accurate ingredient measurements. If you don’t have these, use a standard coffee mug.
Variations
- Chocolate Chip Hawaiian Butter Mochi: Add semi-sweet or dark chocolate chips to the batter for a delightful twist.
- Matcha Mochi: Substitute some of the ube puree with matcha powder for a unique flavor and vibrant green color.
- Fruit-Infused Mochi: Incorporate diced fruits like mango or pineapple for a tropical burst in every bite.
- Vegan Option: Replace eggs with flax eggs and use coconut oil instead of butter for a dairy-free treat.
- Nutty Delight: Mix in chopped nuts like macadamia or almonds for added crunch and flavor.
Serving Suggestions
- Pair your Hawaiian Butter Mochi with a scoop of vanilla ice cream for a delightful contrast.
- Serve with fresh tropical fruits like mango or pineapple for a refreshing touch.
- Dust with powdered sugar or drizzle with chocolate sauce for an elegant presentation.
- Enjoy with a cup of coconut or green tea to enhance the flavors.
- For a festive look, garnish with edible flowers or mint leaves.
FAQs about Hawaiian Butter Mochi with Ube
Can I use regular rice flour instead of sweet rice flour?
No, sweet rice flour is essential for that chewy texture. Regular rice flour won’t give you the same delightful results.
How do I store leftover Hawaiian Butter Mochi with Ube?
Store it in an airtight container at room temperature for up to three days. If you want to keep it longer, refrigerate it for up to a week.
Can I freeze Hawaiian Butter Mochi with Ube?
Absolutely! Cut it into squares and freeze in a single layer. Once frozen, transfer to a freezer bag. It can last up to three months!
What can I substitute for ube puree?
If you can’t find ube puree, you can use purple sweet potato puree or even pumpkin puree for a different flavor and color.
Is Hawaiian Butter Mochi with Ube gluten-free?
Yes! Since it’s made with sweet rice flour, this dessert is naturally gluten-free, making it a great option for those with gluten sensitivities.
Summarizing the Joy of Hawaiian Butter Mochi with Ube
Making Hawaiian Butter Mochi with Ube is more than just baking; it’s about creating sweet memories in your kitchen. The delightful aroma fills your home, inviting everyone to gather around. Each chewy bite is a burst of flavor that transports you to a tropical paradise. Whether you’re sharing it with family or enjoying a quiet moment alone, this dessert brings joy and comfort. Plus, it’s a simple recipe that fits perfectly into your busy life. So, roll up your sleeves and dive into this culinary adventure; happiness is just a slice away!
PrintHawaiian Butter Mochi with Ube: A Sweet Delight Awaits!
Hawaiian Butter Mochi with Ube is a delightful dessert that combines the rich flavors of butter and ube, creating a chewy and sweet treat that is perfect for any occasion.
- Prep Time: 15 minutes
- Cook Time: 50 minutes
- Total Time: 1 hour 5 minutes
- Yield: 12 servings 1x
- Category: Dessert
- Method: Baking
- Cuisine: Hawaiian
- Diet: Vegetarian
Ingredients
- 2 cups sweet rice flour
- 1 cup sugar
- 1 teaspoon baking powder
- 1/2 teaspoon salt
- 1 cup coconut milk
- 1/2 cup unsalted butter, melted
- 1 cup ube puree
- 4 large eggs
Instructions
- Preheat the oven to 350°F (175°C) and grease a 9×13 inch baking dish.
- In a large bowl, whisk together the sweet rice flour, sugar, baking powder, and salt.
- In another bowl, mix the coconut milk, melted butter, ube puree, and eggs until well combined.
- Pour the wet ingredients into the dry ingredients and mix until smooth.
- Pour the batter into the prepared baking dish and spread evenly.
- Bake for 45-50 minutes or until the top is golden brown and a toothpick inserted comes out clean.
- Let it cool before cutting into squares and serving.
Notes
- For a stronger ube flavor, you can add more ube puree.
- Serve with a sprinkle of powdered sugar on top for added sweetness.
- This dessert can be stored in an airtight container for up to 3 days.
Nutrition
- Serving Size: 1 square
- Calories: 200
- Sugar: 10g
- Sodium: 150mg
- Fat: 8g
- Saturated Fat: 5g
- Unsaturated Fat: 2g
- Trans Fat: 0g
- Carbohydrates: 30g
- Fiber: 1g
- Protein: 3g
- Cholesterol: 50mg