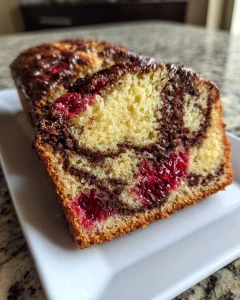
Salted Caramel Earthquake Cake That Tastes Like a Fancy Bakery Made It
As a busy mom, I know how precious time can be, especially when it comes to baking. That’s why I adore this Salted Caramel Earthquake Cake That Tastes Like a Fancy Bakery Made It. It’s a delightful treat that feels indulgent yet is surprisingly simple to whip up. Imagine serving a cake that looks and tastes like it came straight from a gourmet bakery, all while spending minimal time in the kitchen. This recipe is perfect for impressing guests or simply treating yourself after a long day. Trust me, your taste buds will thank you!
Why You’ll Love This Salted Caramel Earthquake Cake That Tastes Like a Fancy Bakery Made It
This Salted Caramel Earthquake Cake is a game-changer for busy lives. It’s quick to prepare, taking just 15 minutes of your time. The rich flavors of chocolate and caramel create a heavenly combination that will have everyone asking for seconds. Plus, it’s a one-pan wonder, making cleanup a breeze. Whether it’s a family gathering or a cozy night in, this cake is sure to impress without the fuss!
Ingredients for Salted Caramel Earthquake Cake That Tastes Like a Fancy Bakery Made It
Gathering the right ingredients is the first step to creating this mouthwatering Salted Caramel Earthquake Cake That Tastes Like a Fancy Bakery Made It. Here’s what you’ll need:
- Chocolate cake mix: The base of our cake, providing that rich, chocolatey flavor.
- Water: Helps to hydrate the cake mix, ensuring a moist texture.
- Vegetable oil: Adds moisture and richness, making the cake tender.
- Large eggs: Essential for binding the ingredients together and adding structure.
- Caramel sauce: The star of the show! It brings that sweet, gooey goodness that makes this cake irresistible.
- Chocolate chips: For extra bursts of chocolatey delight in every bite.
- Chopped nuts (optional): Adds a delightful crunch and nutty flavor; pecans or walnuts work beautifully.
- Powdered sugar: For dusting on top, giving a sweet finishing touch.
- Sea salt: Just a pinch enhances the flavors and balances the sweetness.
For exact measurements, check the bottom of the article where you can find everything listed for easy printing. Feel free to get creative! You can swap in dark chocolate chips for a richer flavor or even use a gluten-free cake mix if needed. The possibilities are endless!
How to Make Salted Caramel Earthquake Cake That Tastes Like a Fancy Bakery Made It
Step 1: Preheat and Prepare
First things first, let’s get that oven preheating to 350°F (175°C). While it warms up, grab a 9×13 inch baking pan and give it a good greasing. I like to use cooking spray for an easy release, but butter works just as well. This step is crucial because we want our Salted Caramel Earthquake Cake to slide right out, looking as beautiful as it tastes!
Step 2: Mix the Batter
In a large mixing bowl, combine the chocolate cake mix, water, vegetable oil, and eggs. I usually whisk it all together until it’s smooth and well-blended. You want to avoid any lumps, so take your time here. The batter should be thick and luscious, promising a rich cake. If you’re feeling adventurous, you can even add a splash of vanilla extract for an extra layer of flavor. Once mixed, you’re ready to pour!
Step 3: Layer the Ingredients
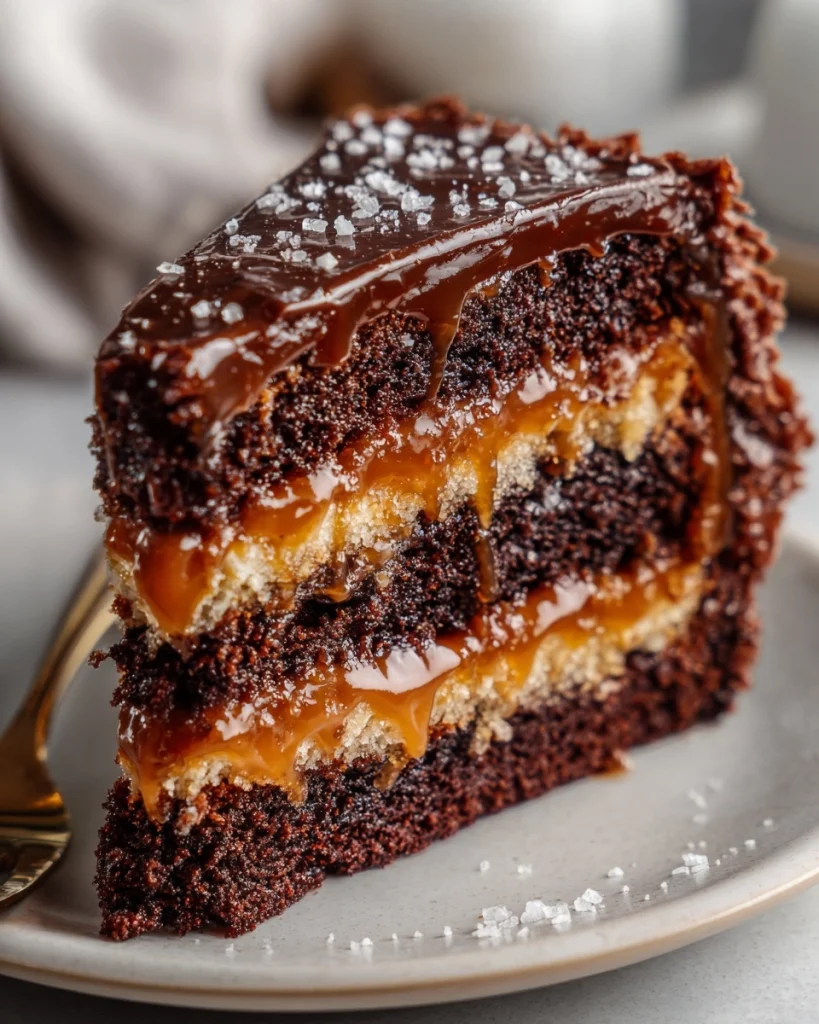
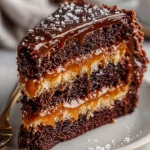
Now comes the fun part! Pour half of the batter into your prepared baking pan, spreading it evenly. Next, drizzle half of that heavenly caramel sauce over the batter. Don’t be shy—let it flow! Then, sprinkle half of the chocolate chips and nuts if you’re using them. Repeat this layering process with the remaining batter, caramel, chocolate chips, and nuts. This creates those delightful “earthquake” cracks as it bakes, making it look like a fancy bakery treat. Trust me, your kitchen will smell divine!
Step 4: Bake the Cake
Slide your masterpiece into the preheated oven and let it bake for 30-35 minutes. Keep an eye on it! You’ll know it’s done when a toothpick inserted in the center comes out clean. If you see a few moist crumbs, that’s okay; it means it’s perfectly moist. Just don’t overbake, or you’ll lose that gooey goodness!
Step 5: Cool and Serve
Once baked, remove the cake from the oven and let it cool in the pan for about 10 minutes. This helps it set up nicely. After that, transfer it to a wire rack to cool completely. When you’re ready to serve, dust it with powdered sugar and sprinkle a pinch of sea salt on top. This final touch elevates the flavors, making it truly irresistible!
Tips for Success
- Use room temperature eggs for a smoother batter.
- Don’t skip the sea salt; it enhances the sweetness beautifully.
- For a richer flavor, opt for dark chocolate chips.
- Let the cake cool completely before dusting with powdered sugar.
- Store leftovers in an airtight container to keep it fresh.
Equipment Needed
- 9×13 inch baking pan: Essential for baking the cake; a glass or metal pan works well.
- Mixing bowl: A large bowl for combining ingredients; any size will do.
- Whisk or electric mixer: For mixing the batter; a whisk is perfect for small batches.
- Measuring cups and spoons: To ensure accurate ingredient amounts.
- Cooling rack: Helps the cake cool evenly; a plate can work in a pinch.
Variations
- Gluten-Free: Substitute the chocolate cake mix with a gluten-free version to accommodate dietary needs.
- Nut-Free: Omit the chopped nuts for a nut-free option, perfect for those with allergies.
- Vegan: Use a vegan chocolate cake mix and replace eggs with flax eggs or applesauce.
- Flavor Twist: Add a teaspoon of espresso powder to the batter for a mocha flavor that pairs beautifully with chocolate.
- Fruit Addition: Incorporate fresh berries or banana slices between the layers for a fruity surprise.
Serving Suggestions
- Pair with Ice Cream: A scoop of vanilla or salted caramel ice cream complements the cake perfectly.
- Fresh Berries: Serve with a side of fresh strawberries or raspberries for a pop of color and flavor.
- Presentation: Serve on a beautiful cake stand for an elegant touch.
- Drinks: Enjoy with a cup of coffee or a glass of milk to balance the sweetness.
FAQs about Salted Caramel Earthquake Cake That Tastes Like a Fancy Bakery Made It
Can I make this cake ahead of time?
Absolutely! This Salted Caramel Earthquake Cake can be made a day in advance. Just store it in an airtight container at room temperature. The flavors will meld beautifully overnight, making it even more delicious!
What can I use instead of chocolate cake mix?
If you’re looking for a change, you can use a vanilla or yellow cake mix instead. Just keep in mind that the flavor profile will shift, but it will still be delightful!
How do I store leftovers?
To keep your cake fresh, store any leftovers in an airtight container at room temperature for up to three days. If you want to keep it longer, you can freeze individual slices wrapped in plastic wrap.
Can I add more toppings?
Definitely! Feel free to get creative. You can add whipped cream, caramel drizzle, or even a sprinkle of sea salt for an extra touch. The more, the merrier!
Is this cake suitable for special diets?
Yes! You can easily adapt this recipe for gluten-free or vegan diets. Just swap the cake mix and eggs as needed, and you’ll have a delicious treat for everyone!
Summarizing the Joy of Baking Salted Caramel Earthquake Cake That Tastes Like a Fancy Bakery Made It
Baking this Salted Caramel Earthquake Cake is more than just a recipe; it’s an experience filled with joy and satisfaction. The aroma wafting through your kitchen will make your heart sing, and the first bite will transport you to a cozy bakery. It’s a cake that brings people together, whether for a family gathering or a quiet evening at home. Plus, knowing you created something so delicious with minimal effort is a win in my book. So, roll up your sleeves, embrace the mess, and enjoy the sweet rewards of your baking adventure!
PrintSalted Caramel Earthquake Cake That Tastes Bakery-Fresh!
A decadent Salted Caramel Earthquake Cake that combines rich flavors and a delightful texture, reminiscent of a fancy bakery treat.
- Prep Time: 15 minutes
- Cook Time: 35 minutes
- Total Time: 50 minutes
- Yield: 12 servings 1x
- Category: Dessert
- Method: Baking
- Cuisine: American
- Diet: Vegetarian
Ingredients
- 1 box chocolate cake mix
- 1 cup water
- 1/2 cup vegetable oil
- 3 large eggs
- 1 cup caramel sauce
- 1 cup chocolate chips
- 1 cup chopped nuts (optional)
- 1/2 cup powdered sugar
- 1/4 teaspoon sea salt
Instructions
- Preheat the oven to 350°F (175°C) and grease a 9×13 inch baking pan.
- In a large bowl, combine the chocolate cake mix, water, vegetable oil, and eggs. Mix until well combined.
- Pour half of the batter into the prepared baking pan.
- Drizzle half of the caramel sauce over the batter, followed by half of the chocolate chips and nuts.
- Pour the remaining batter over the top, then repeat the layering with the remaining caramel sauce, chocolate chips, and nuts.
- Bake for 30-35 minutes or until a toothpick inserted in the center comes out clean.
- Allow the cake to cool, then dust with powdered sugar and sprinkle with sea salt before serving.
Notes
- For a richer flavor, use dark chocolate chips.
- Store leftovers in an airtight container at room temperature for up to 3 days.
- This cake can be served warm or at room temperature.
Nutrition
- Serving Size: 1 slice
- Calories: 350
- Sugar: 25g
- Sodium: 200mg
- Fat: 15g
- Saturated Fat: 5g
- Unsaturated Fat: 8g
- Trans Fat: 0g
- Carbohydrates: 50g
- Fiber: 2g
- Protein: 4g
- Cholesterol: 50mg